

Important Things To Know About DST Files
If you are in the embroidery industry or you are doing embroidery works, you might need to be familiar with the DST file format. This is especially true if you are transitioning your work to the digital medium. If you want to take your traditional embroidery to the digital format but don’t know how we got you covered. This article will list some of the most important things to know about DST file format, a digital format commonly used in embroidery.
Take note that this article will discuss what are DST files, along with other important things to know about that file format. If you are interested in converting your files from JPG to DST instead, you can visit https://www.megadigitizing.com/blog/jpg-to-dst-conversion/. That service provides free of charge conversions, and if there is a charge, it is very minimal. Every conversion is done in just 5 to 30 minutes.
Basics of the DST file format
The DST file format is a file that utilizes computer-aided manufacturing or CAM, which stores its data in the Data Stitch Tajima or DST, a format used for embroidery.
This file format contains data set for stitching an embroidered pattern using a sewing machine, as well as codes that command the sewing machine when to start sewing, when to stop, when to trim, as well as jump. It contains all the instructions needed to sew an embroidery pattern.
The DST file format is among the most widely used formats used in embroider, in part because it is one of the earliest formats. Other popular file formats for embroidery include VIP, EXP, VP3, PES, and JEF.
In case you are a fan of embroidery or you want to start your business with embroidered fabrics, it is possible to make your own designed DST embroidery patterns. Alternatively, you can also get them from a website, page, or forum dedicated to embroidery, or collaborate designs with other embroidery enthusiasts. The design can be edited in a variety of applications or software and then transferred to a sewing machine, as long as it accepts DST files like Tajima. The machine will be the one to stitch your design into a cloth.
What is the best method for transferring a DST file from a computer to a sewing machine?
First, you’ll need to have a USB flash drive or storage device that has sufficient space for your embroidery DST files. Insert the storage device into your computer, and wait until it is recognized by your PC. Once the USB device is opened, a File Explorer for Windows computers or Finder for macOS should open automatically. You can open them yourself if it doesn’t boot automatically. Find the location of the DST file on your computer and transfer it to your USB flash drive or storage device.
After you’ve transferred the file, remove the storage device plugged into your computer and plug it into your sewing machine to copy the DST files that contain the pattern. There are also more advanced sewing machines that are equipped with wireless connectivity like Wi-Fi or Bluetooth, which allows the transfer of files without using USB storage devices. These sewing machines can receive DST files directly from your phone or PC, provided that they support Wi-Fi or Bluetooth file transfer protocol. The procedure for these transfers is similar to how you would copy files with a wireless printer, which is done through the machine’s touchscreen or button interface.
What is the procedure for opening a DST file?
DST files are supported by various software dedicated to embroidery. Some of these include Premier+ Embroidery, Buzz Tools, and SewWhat!.
Understanding The Term SPC And Its Use In Manufacturing Units
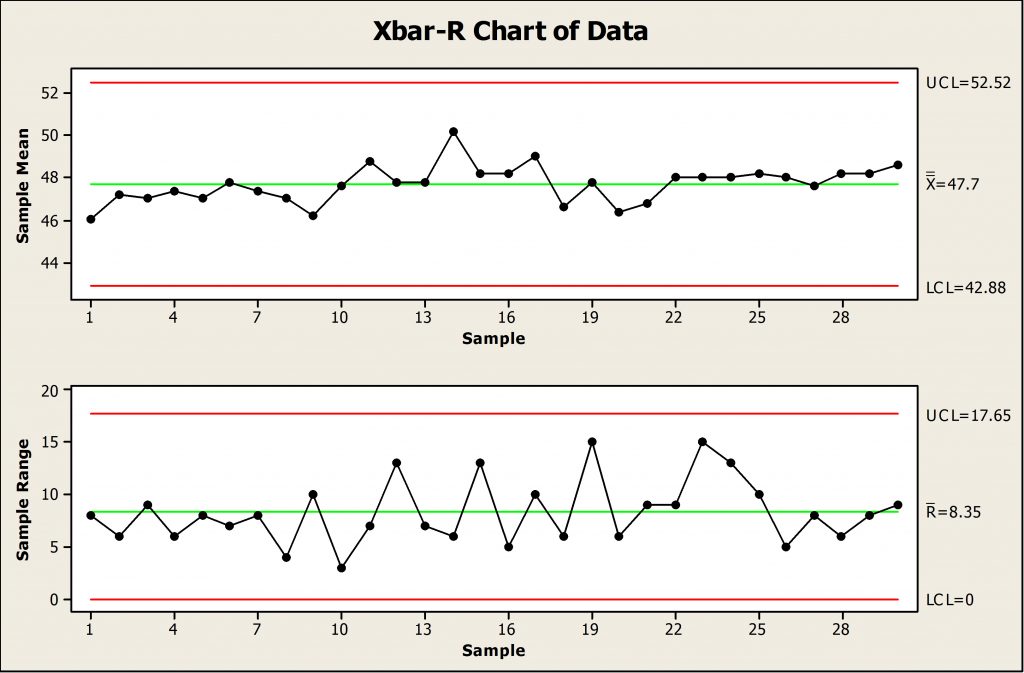
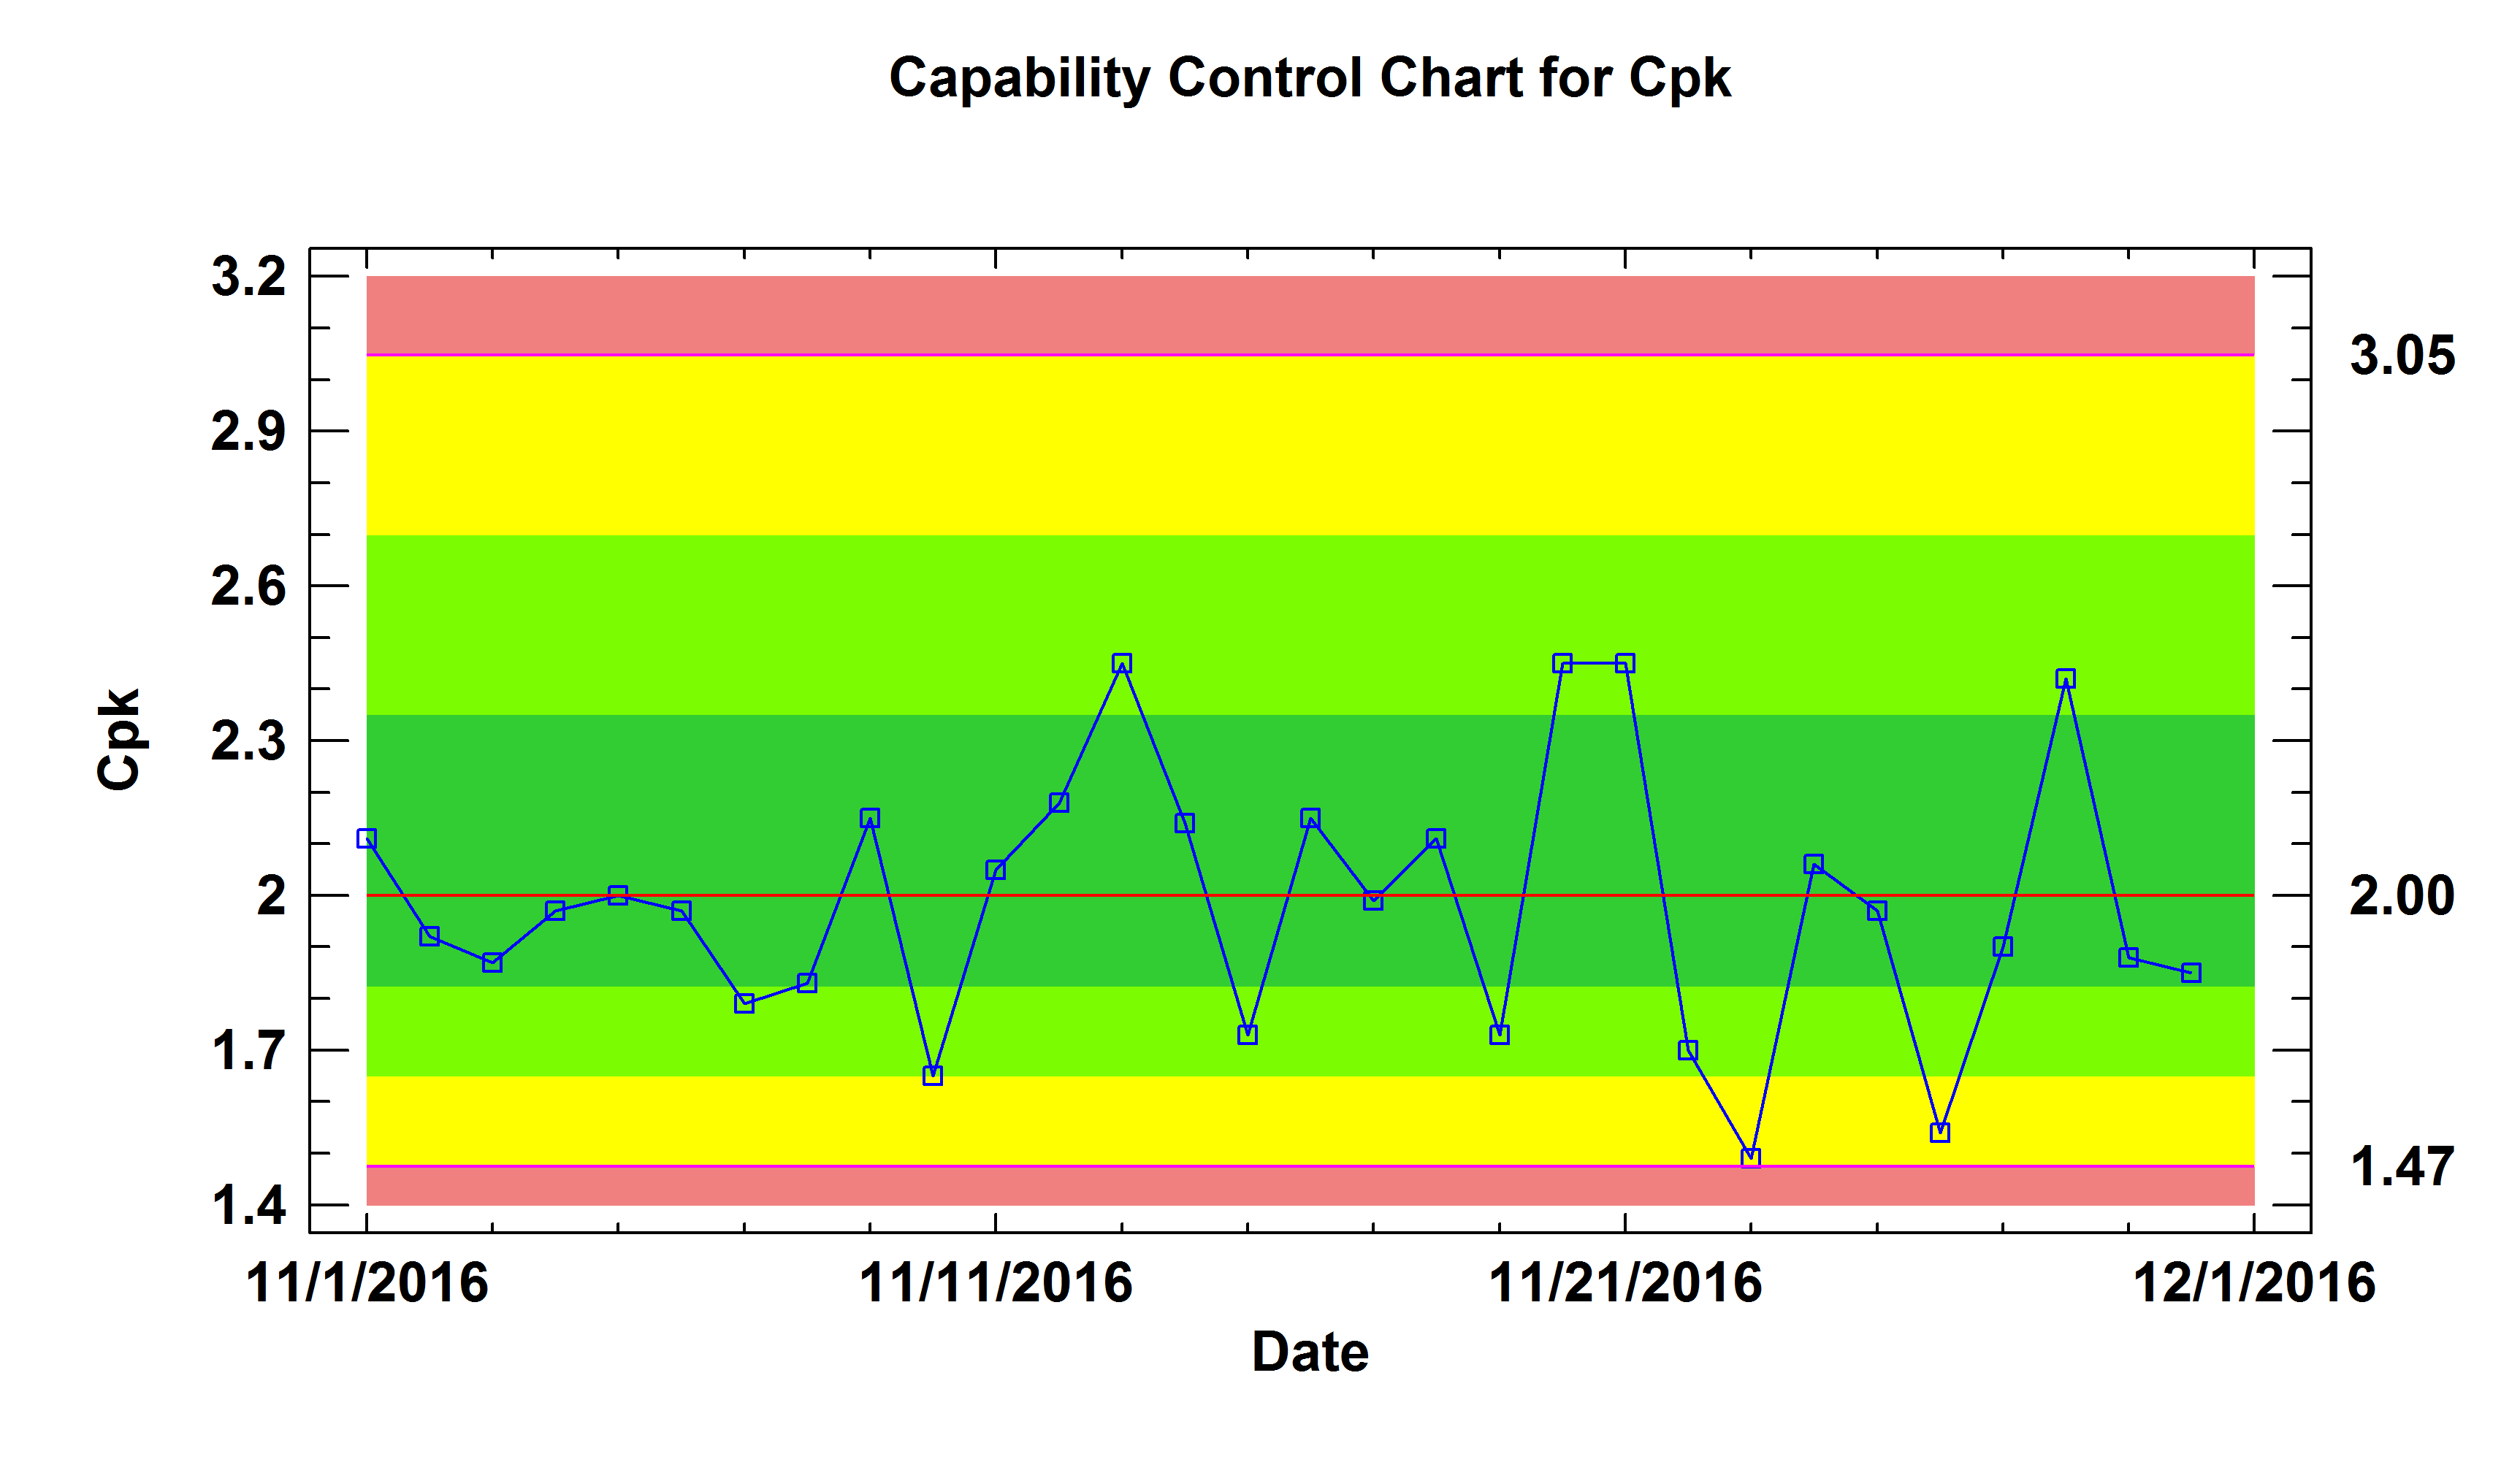
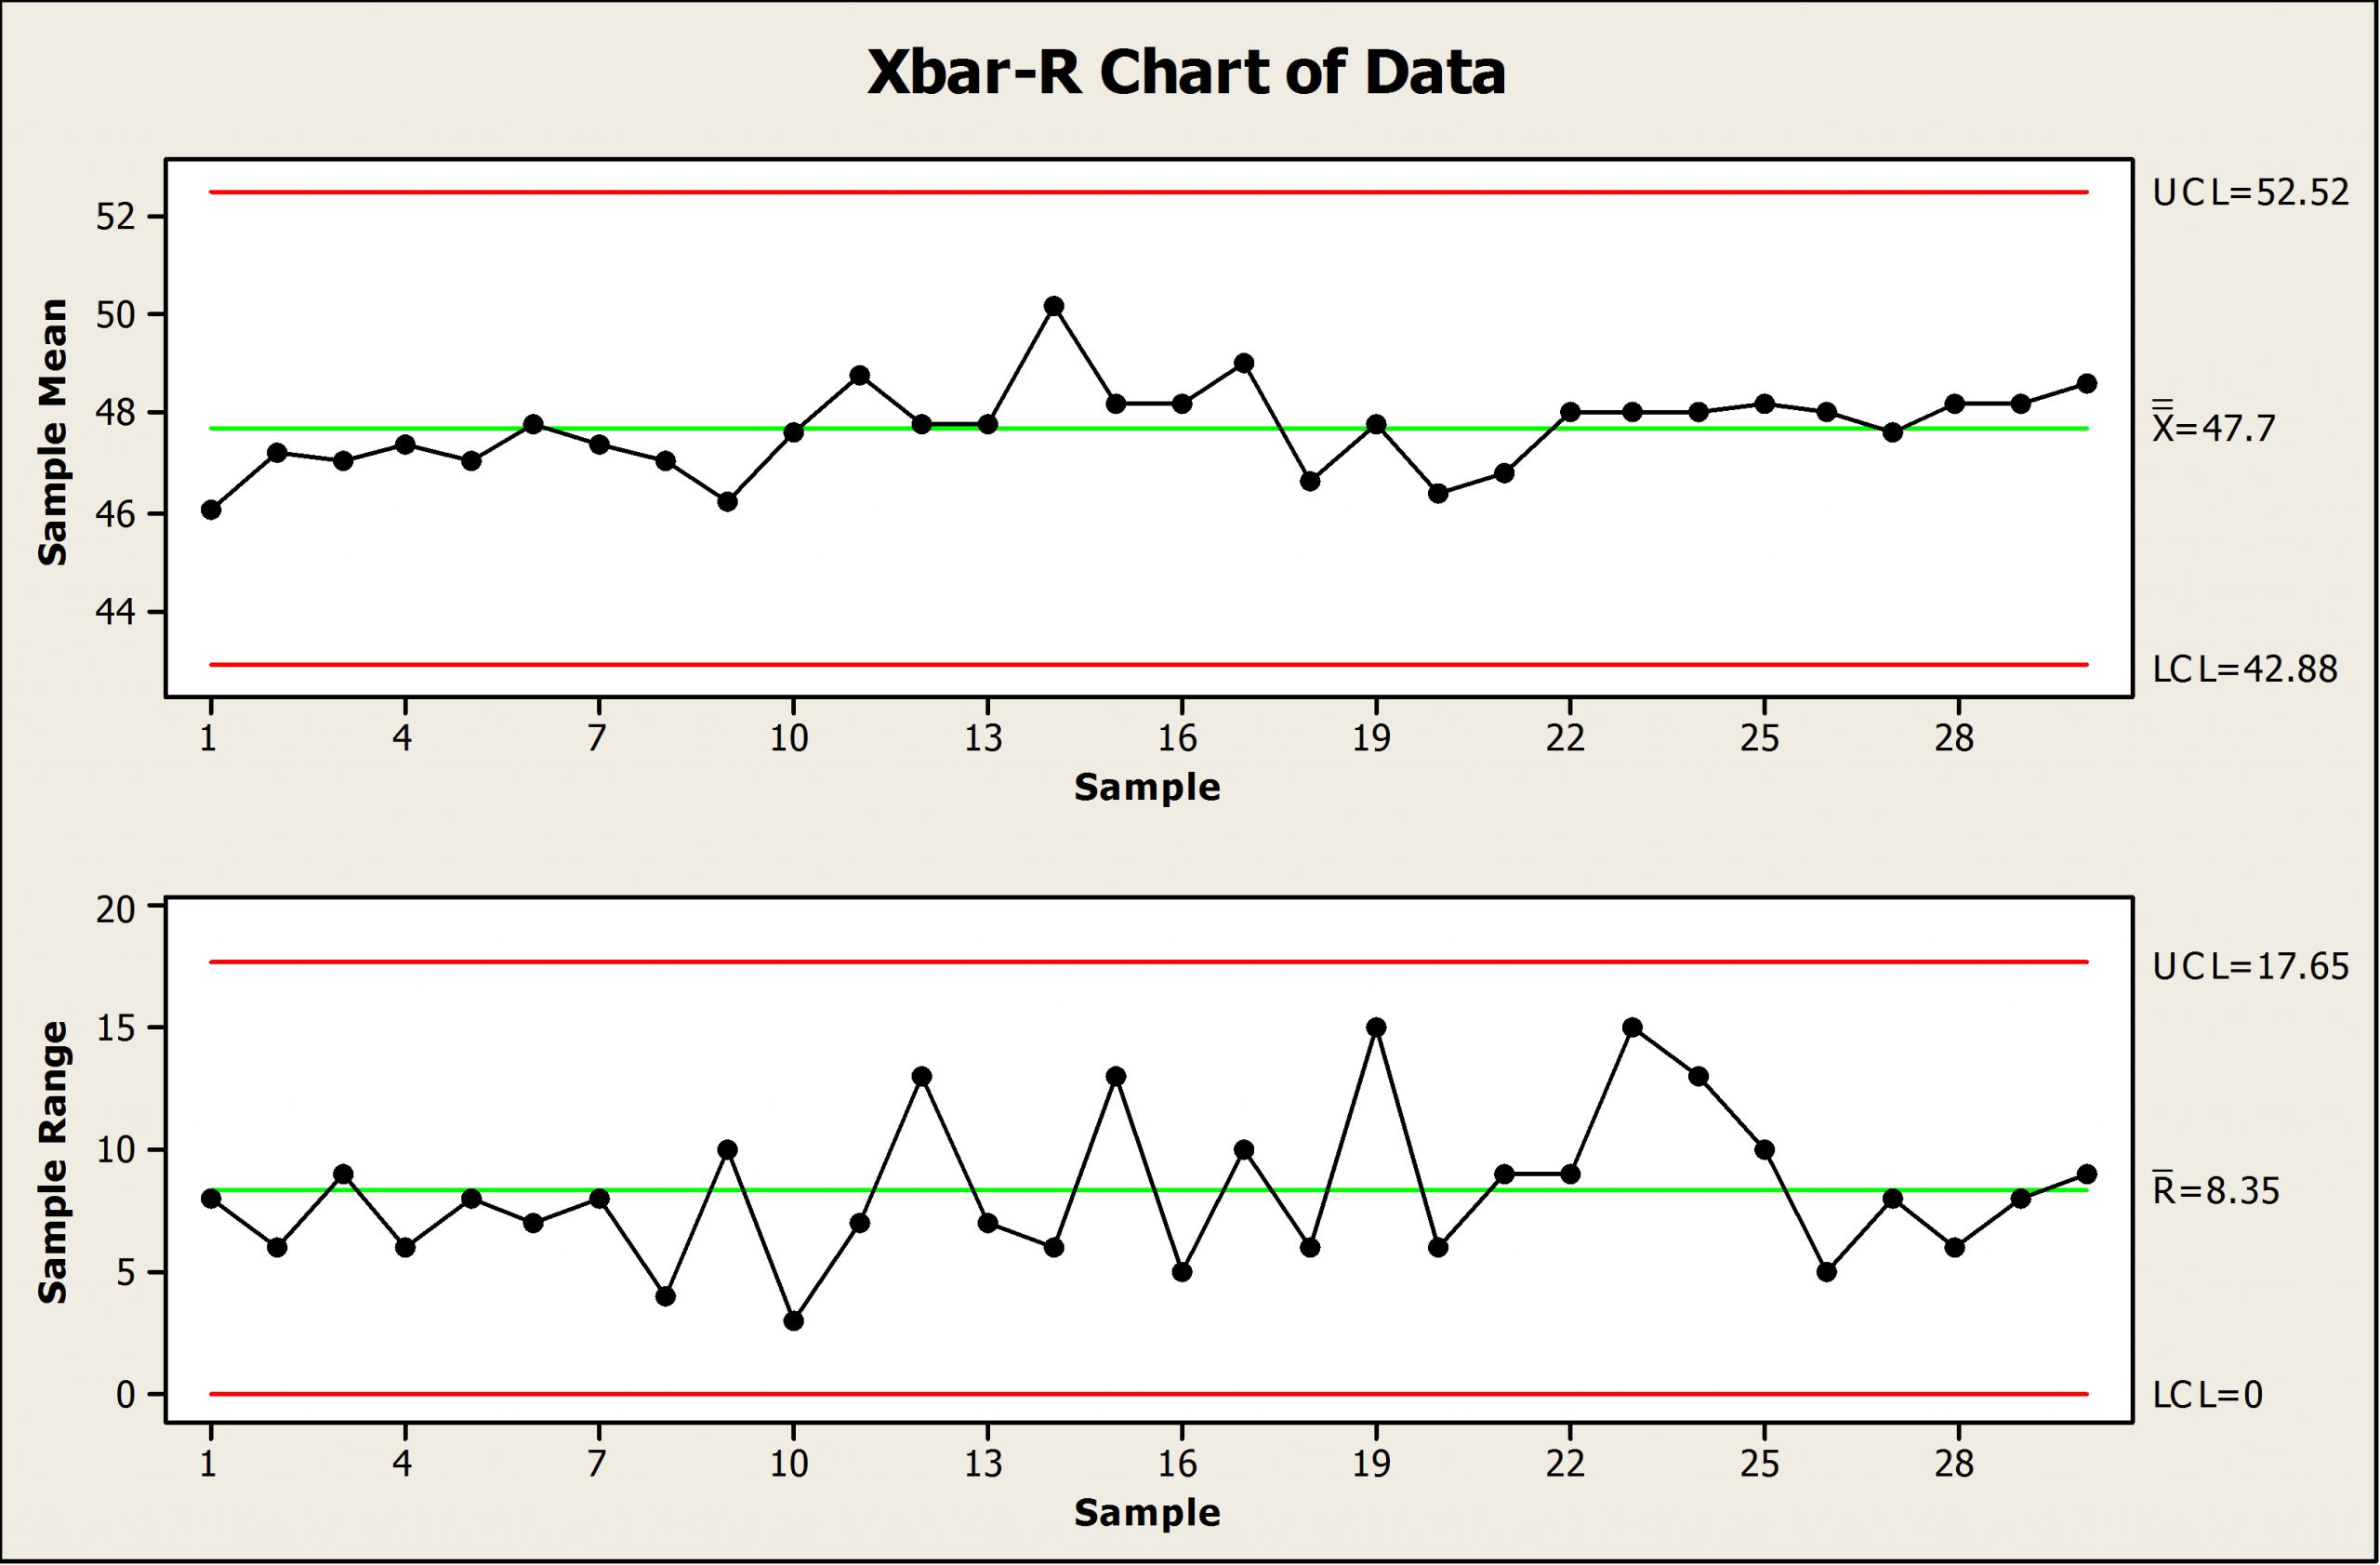
In simple words, SPC is Statistical Process Control. It is crucial software used to gather all the data and stats regarding the production and manufacturing in the industries. This allows us to get all the data and information relevant to the production in just a single click; isn’t it sound beneficial? This is very helpful and helps the company to maintain the production smooth and on time.
Brief Description About The SPC
SPC is a method or tool that can be used by any line of business or company to monitor all the data. The info regarding the details of their business prevents the company from suffering from the loss. They study all the information and statistics and enhance the quality of production. This tool also improves the efficiency of the manufacturing unit as it points out the mistake for the improvement in the business.
Thanks to this technology and software, we can quickly examine the whole production details process in a single click. This makes the work of gathering data way easier than it used to be. This was designed to check all the parameters to increase the accuracy of data and information. You can learn more about it with its history and other info on https://operatorsystems.com/our-platform/process-parameter-spc/
Benefits Of Using SPC
- Reduces The Margin Of Error
The SPC tool allows recording the data in real-time, which is an advantage. In addition, real-time SPC helps detect the manufacturing line problems, which can save you from having deep future troubles.
The data and info can be seen from anywhere on the computer screen to your mobile phone. Continuously tracking the data helps reduce the margin of error as the SPC software or tool warns the operator from any future problems and errors.
- Helps In Finding The Problem In Very Less Time
To keep the production or manufacturing running smooth and efficient, we use the SPC tool. Without the assistance of this tool, it could be challenging for the operator to detect the problem in the large assembly of machines in the industry. Therefore, finding problems in minimal time is very important to prevent manufacturing from getting stopped.
The operator can sometimes tamper with the production process without the proper analysis of data, which could get the whole factory too late on time. Thus having the data and stats recorded by the SPC system is always an advantage.
- Lower The Cost Of Production
The SPC allows the smooth running of the industry to produce the product with the required quality that too before the deadline. Moreover, the lesser the problems in the assembly line, the more money the company will save in repairing or replacing the damaged parts. This is beneficial for the customer as it reduces the cost of production, and the company gets more margin to give out the discount to the customer.
- Improves the quality
If you did not use the SPC software, it would be difficult to detect the problem in the manufacturing process. This will lead to a decline in the quality of products, and the worst is that you will not be able to find until the whole batch of products is ready. Thus, maintaining the constant manufacturing process with the help of the SPC tool improves the productivity and quality of the product.
- Reduces The Waste And Variations
The key benefit of using the SPC software is to have a uniform product. This makes sure that it reduces the error in making of product to reduce the amount of waste. The waste material cannot be used in the future and is thrown in the dumping ground. This makes the manufacturing of the company suffer a loss. SPC can help you with this, too, as it allows the machine to do error-free work and monitor the data to prevent all the threats of causing the problem in production.
Overall it doesn’t matter whichever type of business you own, and it is impossible to avoid the challenges of operating the manufacturing units. But at least by using several tools or methods, you can improve the quality. SPC is one of them, and it allows having a smooth pace in the manufacturing system.
The introduction of this tool has saved a lot of companies from getting bankrupt due to the challenges in the manufacturing units and the factory. This gave a chance to the company to correct all the defects and mistakes in their production line to save them a massive amount of money. Now, this technology is used in almost every business, from automobiles to clothing brands.
Everyone knows how important SPC is for their business, and that is why this tool is being evolved day by day to give the best result to the business owners. Thus, with all these benefits and advantages, we recommend you use this tool in your factory or industry to manage the manufacturing system easily.
What is an Arpeggiator VST plugin? Why a musician should have one?
An Arpeggiator is a powerful musical tool that transforms any chord or note into a complex rhythmic, tonally dynamic musical sequence. Each Arpeggiator is different, but the most basic ones allow the user to control the clock rate and note divisions. They also have the ability to change the direction of play. Electronic music is vastly popular due to Arpeggiators plugins. They can add flavor and variety to even the simplest compositions. Arpeggiators are used by many well-known electronic artists. We will be sharing some of the most popular DAW VST Hub Arpeggiator List right now in the next paragraphs.
SimpArp by WOK
SimpArp is one of our most basic Arpeggiators. It is the easiest Arpeggiator to use, as it has a user-friendly interface, with zero menu-diving option. The drawback is that it is not compatible with Windows. Wok offers more downloads if you are looking to explore further. To create an account, you will only need to register.
Sweet MIDI Arpeggiator
Sweet MIDI Arpeggiator offers the same basic operations as any other Arpeggiators. This multi-channel Arpeggiator lets you control four devices at once by routing MIDI data from your software to each source. The plus point of this Arpeggiator is its graphical interface. For those who want simplicity, Sweet MIDI Arpeggiator has little to no menu diving.
Arpeggiator by Ableton Live
It is worth noting Ableton Arpeggiator. Although it might seem simple, it offers all the same features as most standalone Arpeggiator. Both of these features (offset and groove) add variety and swing to your arpeggios. It is a complete built-in Arpeggiator. You can still use Ableton Lite Arpeggiator even if you do not want to buy Ableton Standard Version or the Full Suite. There are some limitations. Be aware of what Ableton Live Lite offers.
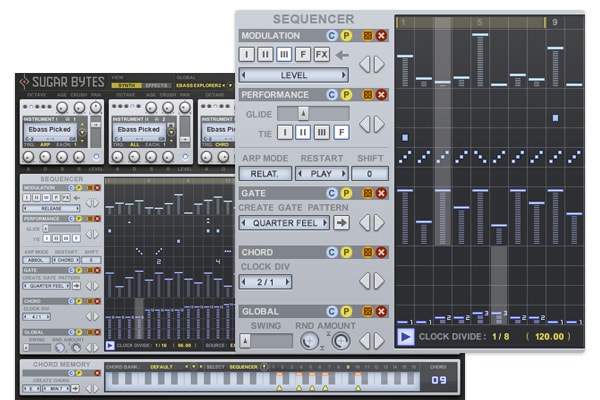
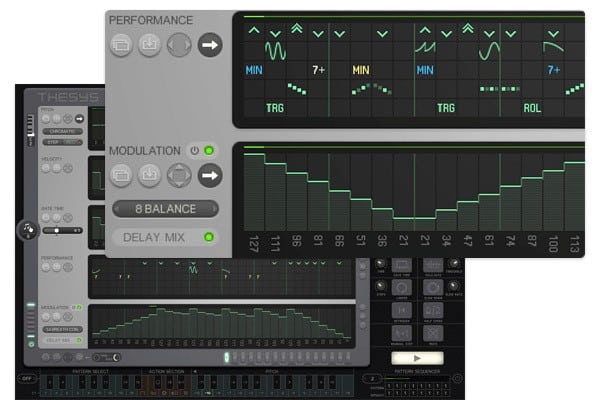
Sugar Bytes – Thesys
Thesys is more complicated than its competitors are. Thesys is a MIDI sequencer with many features that allows you to create your own arpeggio patterns or choose from a set of presets and then test them. You can use the onboard synthesizer for testing patterns or route MIDI data into another software or hardware. The visual representation of each arpeggio parameter is one of Thesys’ most outstanding features. You can change any parameter (velocity, gate time and modulation) while working on a project.

Cream Arpeggiator from Kirnu
The Cream Arpeggiator is a powerful tool. It is also much more affordable compared to others in segment. Cream includes all of the basic features, but with more options, such as chord memory, independent tracks and a visual pattern sequencer. This allows you to trigger various options like transposing, mutating and mangling without having to touch your software. You can also save presets and modify them to suit your needs. The plugin can route MIDI to up to four tracks simultaneously.
Cthulhu by Xfer Records
It is a favorite among electronic music producers because of its ability to unleash creativity in a matter of seconds. This plugin is a combination of a chord progression generator and a pattern-based Arpeggiator. You can also program the plugin so that it receives MIDI data if the user wants to control the software with knobs or sliders from an external device. It allows you to customize your arpeggios step-by-step like no other plugins.
Anydesk Descargar and Enabling It in PC Startup
Anydesk is a cool application for remote viewing and control of different devices. That’s why you want Anydesk descargar today for you to start enjoying its features and perks. However, you should keep a few points in mind to make the most out of this fantastic app. These points circle on properly downloading and setting up Anydesk for use in a desktop or PC.
How to Optimize Anydesk Descargar and Use for Your Purposes
Anydesk is a fantastic application for remotely controlling different devices nearby. The app lets you use another device without physically touching it, which is perfect for various purposes. For example, you can download, install, and use an application on a different PC using your device on hand. That is excellent for teaching somebody how to use an application on their computer.

Now, how to optimize such Anydesk functions? The secret lies in grabbing the right Anydesk download, then set it up properly.
Downloading Anydesk
Similar to other apps, the first thing to remember is to download Anydesk from its official website. That helps you grab a legitimate copy of Anydesk. It helps you avoid malware and spyware while downloading and executing the app as well.
When selecting a download, you can choose between the free or business Anydesk version.
The free version is excellent for personal use since it carries the essential features of Anydesk. That includes the feature which lets you remotely connect to a computer nearby, and it also lets you record your remote activities for later viewing. Moreover, you can virtually draw on the screen of the target device. Such a feature is perfect for teaching somebody about using certain apps on their computers.
With the business versions, you can go for light, professional, or power subscriptions. Each varies in terms of the number of devices you can control, length of sessions, and additional features. You should choose one that fits your business needs without spending unnecessary costs.
Installing Anydesk and Enabling it On Startup
One of the great things about Anydesk is that you don’t need to open an account to enjoy the app and its features. You only need to install it on your computer if you have an installable file. If you have a portable version, however, you only need to run it for use.

It is also possible to make Anydesk automatically launch when your computer starts. First, you need to locate the application file of Anydesk on your computer. To find the file, type “Anydesk” in the search field of the start menu, right-click on Anydesk, then click on the open file location. If you’re using the portable version, the portable file is what you need.
After locating the necessary file, create a shortcut of such a file. Just right-click on the file and select create shortcut.
Next, press Windows Key+R to open the Run dialog box. Then type “shell:startup” (without the quotes). Lastly, copy the shortcut file you’ve made into the Startup folder.
Now, you already know how to optimize the use of Anydesk for your purposes. Just note to grab the right anydesk descargar, then set it up properly on your computer.